|
In
August of 2003, I covered the removal and outside prep of the gas tank
in it's original bad shape. Consequently there was a time lag on my part to
get the rest of it done. SO, here's the last chapter on that episode.
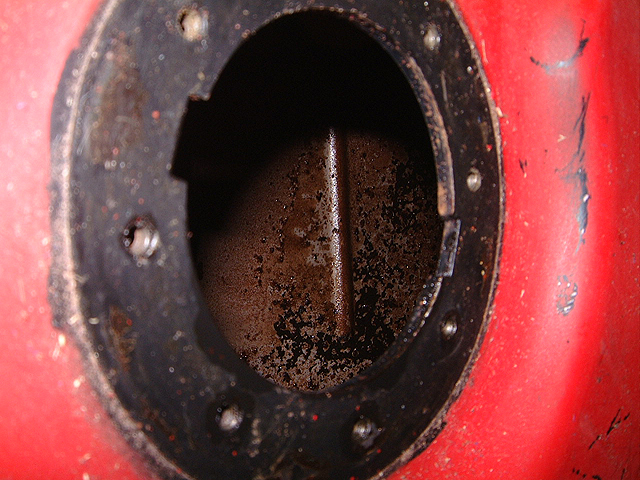
WHEN WE LAST LOOKED, there was lots of rust in the bottom of
the tank and other things interfering with good fuel flow. After bead
blasting the outside, I POR-15'd the exterior in preparation for a dip in
the tank at the radiator shop. |
 |
|
That effort paid off as you will see below. For $45, they
boil out the tank overnight and then acid wash the inside to keep rust away
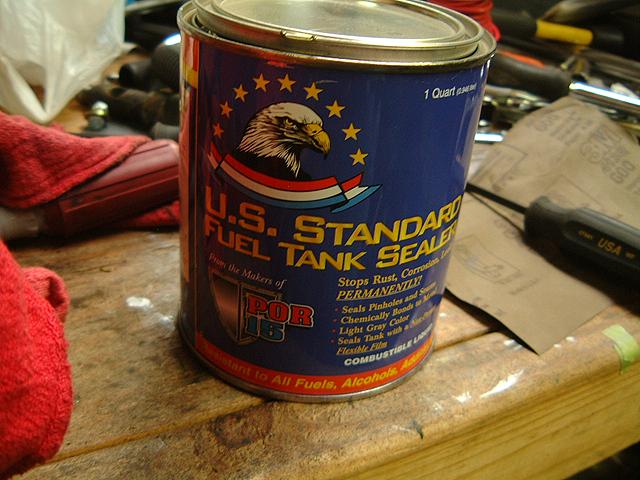
for 24-48 hours. You must act fast to stop the rust by using a tank sealer
as I will show in subsequent steps of this restoration. Shown below is like
8 hours after the water was poured out... but there is no crud! |
 |
|
NEXT, you need a bottle of POR-15's Metal Prep solution. It
works to attack this area and neutralize the activity of rust on the metal
surface as you can see below after just 30 minutes. I used this to treat
other metals such as the inside of my oil pan in May before painting. There
are many uses for Metal Prep when restoring the car! |
 |
|
Following their directions carefully, prepare the tank by
eliminating all moisture inside the tank with compressed air, heat or
whatever you have on hand. Open this can of sealer and stir it up. |
 |
|
Essentially, it looks like silver POR-15 but it's different.
You simply pour the entire can into the tank and slosh the coating around
until after 15-20 minutes you have every surface inside the tank coated with
the stuff. Pour it out into the can and drain for 20 minutes. I repeated the
process to get another covering of the tank. When done, drain again
and set the tank out of the way and cover the holes with rags so that air
and the coating can cure. Throw the can and excess coating in the trash -
don't replace the lid, the can will explode! 96 hours later, you are
ready to paint the outside of the tank once and for all. |
 |
|
I sanded the POR-15 with Scotchbrite and then used a Zinc
primer to seal up the surface. I used two different ways to paint the tank -
one for outside the car, one for inside. |
 |
|
I used on the outside 3M Professional Grade Undercoating.
This is available at commercial auto paint stores about $11 per can... Only
one can needed. |
 |
|
This is a nice, textured finish that will bounce off foreign
objects when it's cured. |
 |
|
On the top side, I used Wurth Satin Black paint in rattle
can. It's about 3 coats but looks right - you don't want it shiny. You can
see here that the POR-15 Tank sealer is nice and grey like new metal. It
looks like silver powder coating in real life. |
 |
|
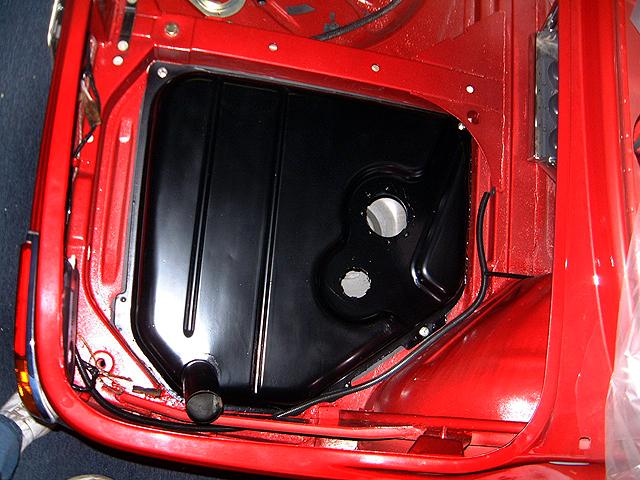
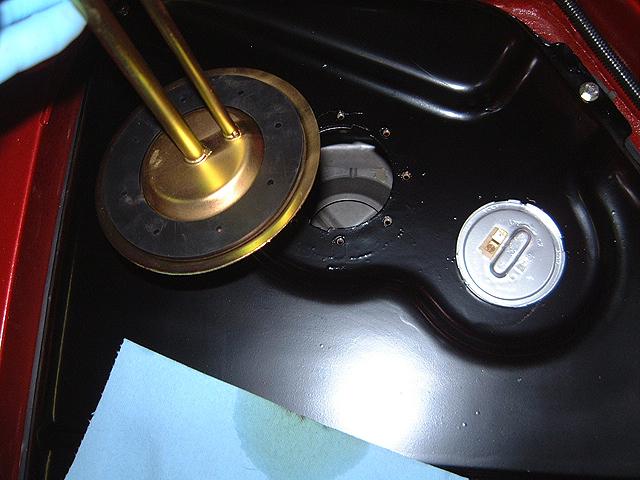
A closer look with the tank and the sending unit installed.
Stainless steel hardware was used to fasten the tank back in the car, along
with a non-porous hand fabricated neoprene rubber seal. |
 |
|
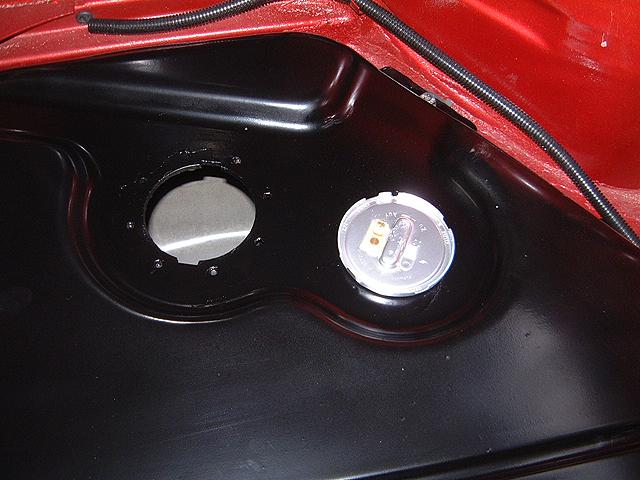
Ok, before I put the sender in the tank I added a new rubber
seal as shown around the inside lip of the sender. |
 |
|
There is another new neoprene rubber seal used around the top
of the tank siphon. |
 |
|
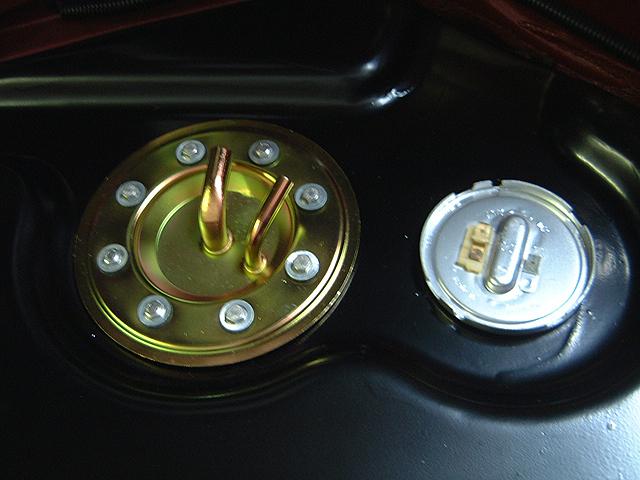
Ok, all installed with new stainless steel hardware on the
siphon tube. |
 |
|
Close up view of finished work. |
 |
|
Next is a new rubber fuel neck. Also the hardware holding the
neck on is re-plated original. |
 |
|
The TII has a recirculating fuel system. This unit is
different than carb model cars. This was also a replated original part of
the car. |
 |
|
This screen is in the bottom of the pickup and is the first
line of defense against foreign objects in the fuel tank. |
 |
|
There are two sizes of fuel hoses connected to the top. The
bigger is the feed line to the fuel pump, the smaller is the return line
from the back of the kugelfisher pump in the engine compartment. |
 |
|
NOTE: While I was here in the trunk I was able to rig up an
electronic trunk opener. This mounts conveniently to the bolts holding the
license plate on the car. This is not only going to be a convenience, but a
fail safe if the trunk mechanism sticks or the keys become lost. After
bashing a tail light out to get to it before, I'm leaving nothing to chance.
This unit will be integrated into the keyless entry system of the car in a
future site update. |
 |
| |
| NEXT:
Sun Roof Drains |

